Is your favorite pair of headphones starting to look grimy and sound a bit dull? Don’t worry – cleaning your headphones is easier than you might think! In this article, we will guide you through the steps to effectively clean your headphones, removing dirt, debris, and bacteria, and restoring them to their former glory.
Importance of Cleaning Headphones
Headphones are an essential accessory for many individuals, whether you use them for work, entertainment, or simply to enjoy your favorite music. Over time, headphones can accumulate dirt, sweat, oils, and bacteria, which can not only affect their appearance but also impact their performance. Regularly cleaning your headphones not only helps to maintain their hygiene but also enhances their sound quality and prolongs their lifespan.
Materials Needed for Cleaning Headphones
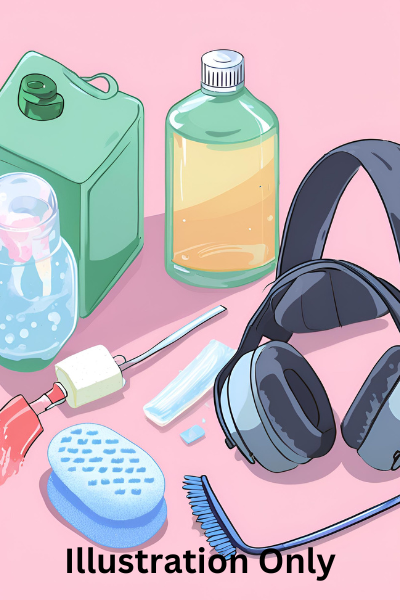
Before diving into the cleaning process, gather the necessary materials to ensure a thorough and safe cleaning experience. You will need the following items:
- Soft microfiber cloth or cotton swabs
- Mild soap or dish detergent
- Isopropyl alcohol or disinfectant wipes
- Toothbrush or soft-bristled brush
- Compressed air can
- Ziplock bag or headphone case
Having these materials at hand will make the cleaning process more efficient and effective.
Cleaning the Ear Cushions
The audio drivers are the heart of your headphones, responsible for delivering high-quality sound. Keeping them clean is crucial for optimal performance. Here’s how you can clean the audio drivers effectively:
- Use a soft-bristled brush or a clean, dry toothbrush to gently remove any visible dust or debris from the audio drivers. Be careful not to apply excessive pressure or touch the delicate components.
- For stubborn dirt or debris, use compressed air to blow away particles without touching the audio drivers directly. Hold the canister upright and use short bursts of air to avoid damaging the drivers.
- If the audio drivers have removable grilles, carefully remove them following the manufacturer’s instructions. Clean the grilles using a soft brush or by rinsing them with warm water and mild soap. Ensure they are completely dry before reattaching them.
- Avoid using liquids or cleaning solutions directly on the audio drivers, as they can damage the delicate components.
By regularly cleaning the audio drivers, you can maintain their performance and ensure an optimal listening experience.
Cleaning the Headband
The headband of the headphones is another area that can accumulate dirt, sweat, and oils. Cleaning the headband is essential not only for hygiene but also for comfort. Here’s how you can clean it effectively:
- Depending on the material of your headphones’ headband, you may need to use different cleaning methods. For leather or faux leather headbands, use a soft microfiber cloth or cotton swabs dampened with mild soap or leather cleaner to wipe away any visible dirt or grime. For fabric headbands, check the manufacturer’s instructions for specific cleaning recommendations.
- Gently wipe the headband in a back-and-forth motion, paying attention to any stained or soiled areas.
- For deeper cleaning, mix a small amount of mild soap or leather cleaner with water and dip the cloth or cotton swabs into the solution. Squeeze out excess liquid to avoid saturating the headband.
- Gently wipe the headband in the direction of the material’s grain, ensuring thorough coverage.
- Once cleaned, rinse the cloth or cotton swabs and dampen them with clean water. Wipe away any soap residue from the headband.
- Allow the headband to air dry completely before using or storing your headphones.
By cleaning the headband regularly, you can maintain its appearance and ensure a comfortable fit.
Cleaning the Audio Drivers
The audio drivers are the heart of your headphones, responsible for delivering high-quality sound. Keeping them clean is crucial for optimal performance. Here’s how you can clean the audio drivers effectively:
- Use a soft-bristled brush or a clean, dry toothbrush to gently remove any visible dust or debris from the audio drivers. Be careful not to apply excessive pressure or touch the delicate components.
- For stubborn dirt or debris, use compressed air to blow away particles without touching the audio drivers directly. Hold the canister upright and use short bursts of air to avoid damaging the drivers.
- If the audio drivers have removable grilles, carefully remove them following the manufacturer’s instructions. Clean the grilles using a soft brush or by rinsing them with warm water and mild soap. Ensure they are completely dry before reattaching them.
- Avoid using liquids or cleaning solutions directly on the audio drivers, as they can damage the delicate components.
By regularly cleaning the audio drivers, you can maintain their performance and ensure an optimal listening experience.
Cleaning the Headphone Cable
The headphone cable is often overlooked when it comes to cleaning, but it can also accumulate dirt, oils, and tangles. Cleaning the cable not only improves its appearance but also prevents any interference with the audio signal. Here’s how you can clean the headphone cable effectively:
- Begin by unplugging the cable from your headphones and audio source.
- Use a soft microfiber cloth or cotton swabs dampened with water or isopropyl alcohol to gently wipe away any visible dirt or grime from the cable.
- For tangled cables, hold one end firmly and gently untangle the knots using your other hand. Avoid pulling or twisting the cable excessively, as this can damage the internal wires.
- If the cable has stubborn stains or residue, dampen the cloth or cotton swabs with a small amount of mild soap or dish detergent diluted in water. Wipe the cable in a gentle, twisting motion to remove the stains.
- Once cleaned, wipe the cable with a clean, dry cloth to remove any excess moisture.
- Allow the cable to air dry completely before using or storing your headphones.
By keeping your headphone cable clean and untangled, you can ensure a hassle-free listening experience.
Deep Cleaning Your Headphones
In addition to regular maintenance, deep cleaning your headphones once in a while can help remove stubborn stains, bacteria, and odors. Here’s how you can deep clean your headphones:
- Prepare a mixture of mild soap or dish detergent and warm water in a small bowl or sink.
- Gently disassemble your headphones following the manufacturer’s instructions, if possible. Remove any detachable parts, such as ear cushions, grilles, or cables.
- Dip a soft microfiber cloth or cotton swabs into the soapy water and squeeze out excess liquid.
- Wipe all the headphone components thoroughly, paying attention to any stained or soiled areas. Avoid saturating the components with excessive liquid.
- Rinse the cloth or cotton swabs and dampen them with clean water. Wipe away any soap residue from the headphone components.
- Allow all the components to air dry completely before reassembling them.
Deep cleaning your headphones periodically will maintain their cleanliness and ensure optimal performance.
Tips for Maintaining Clean Headphones
Once you have cleaned your headphones, it’s essential to maintain their cleanliness to prolong their lifespan and ensure consistent performance. Here are some tips for maintaining clean headphones:
- Store your headphones in a clean, dry place when not in use. A ziplock bag or a dedicated headphone case can protect them from dust, moisture, and accidental damage.
- Avoid using your headphones with dirty or sweaty hair to prevent oil and dirt buildup on the ear cushions and headband.
- Clean your headphones regularly, ideally every few weeks, or more frequently if you use them intensively or in dusty environments.
- Be gentle when handling your headphones, avoiding excessive force or bending, which can cause damage.
- If you share your headphones with others, consider using disposable headphone covers or wiping them with disinfectant wipes between uses to maintain hygiene.
By following these maintenance tips, you can enjoy clean and well-performing headphones for years to come.
Common Mistakes to Avoid When Cleaning Headphones
While cleaning your headphones, it’s crucial to avoid common mistakes that can lead to damage or poor results. Here are some mistakes to avoid:
- Using excessive force or harsh cleaning solutions, which can damage the delicate components of your headphones.
- Submerging your headphones in water or other liquids, as this can irreversibly damage the internal electronics.
- Using abrasive materials, such as rough cloths or scrub brushes, which can scratch or wear down the headphone surfaces.
- Neglecting to read the manufacturer’s instructions for specific cleaning recommendations, as different headphones may require different cleaning methods.
- Rushing the drying process, as moisture can cause damage or affect the sound quality. Ensure that all components are completely dry before using or storing your headphones.
By avoiding these common mistakes, you can clean your headphones safely and effectively.
Conclusion
Cleaning your headphones is a simple yet essential task that can significantly improve their appearance, sound quality, and longevity. By following the step-by-step instructions provided in this article, you can safely and effectively clean your headphones, removing dirt, debris, and bacteria, and restoring them to their former glory. Remember to gather the necessary materials, clean the ear cushions, headband, audio drivers, and cable, and periodically deep clean your headphones for optimal results. With proper care and maintenance, your headphones will continue to provide you with an exceptional listening experience for years to come.
So, let’s dive in and give your headphones the TLC they deserve!

